Optimising Images

Introduction
Preparing images for using on your website can be tricky and the effect of getting in wrong can be a slow loading page or even worse, the image doesn't appear at all!
Admittedly, that's a worst case scenario but it is still a good idea to know what formats are best, why you should use them and how they can be optimised to ensure a great experience for your website visitors.
Take a look at the info boxes to find out more and then use the guide below to prepare your images using the iLoveIMG website.
Why optimise?
Optimised images provide a smoother experience for visitors by delivering smaller file sizes while maintaining quality. While broadband connections are common, not everyone has lightning fast speeds so it is important to consider these users.
Additionally, a better optimised image can improve accessibility and SEO performance by having the ALT tags and descriptions that both users and search engines use.
Image file formats
There are many image formats but generally there are four that are most commonly used for websites, and they have very specific uses:
JPEGs or JPGs
JPGs are 'lossy' image files, meaning that depending on the compression level used, the quality degrades and can result in 'noise'. This is because the compression uses maths to calculate the likely colour values of pixels in groups of squares. JPGs are best for photos, especially where fidelity is less important, like a landscape photo.
GIFs
Officially pronounced 'jif' but everyone uses the hard 'g' version, this format is generally dying out but under the right circumstances it can still useful. Because GIFs are limited to a set number of colours, they are best used for images with just a few colours, like logos or icons.
SVGs
Becoming more popular due to browser support, SVGs are vector files, meaning they are created entirely by using maths, resulting in sharp, clean lines that best suit logos, icons and simple animations.
PNGs
With careful optimisation, PNGs can used instead of JPGs as they are great for photos and graphics. However, the format stores position and colour values for every single pixel and this can result in some very large files.
Optimisation guidelines
Image optimisation is about getting the balance between what the image conveys, how big it needs to be (dimensions) and how much quality can be compromised. Get it right and it can have a significant impact on your website visitor's experience. It could be the difference between a sale and someone getting fed up and going elsewhere!
Crop, resize, compress
Follow the following steps to do everything needed to get your images resized and compressed ready for use on your website.
Note that you should only hit the download button after all steps have been completed.
1. Go to www.iloveimg.com and click "Crop Image".
2. Drag in your image.
3. Input the size you want your final image. In this case it is 1440 x 960 pixels. Hold the SHIFT key while resizing the blue box to crop the image and keep the ratio. The size will change - this is normal. Click Crop IMAGE.
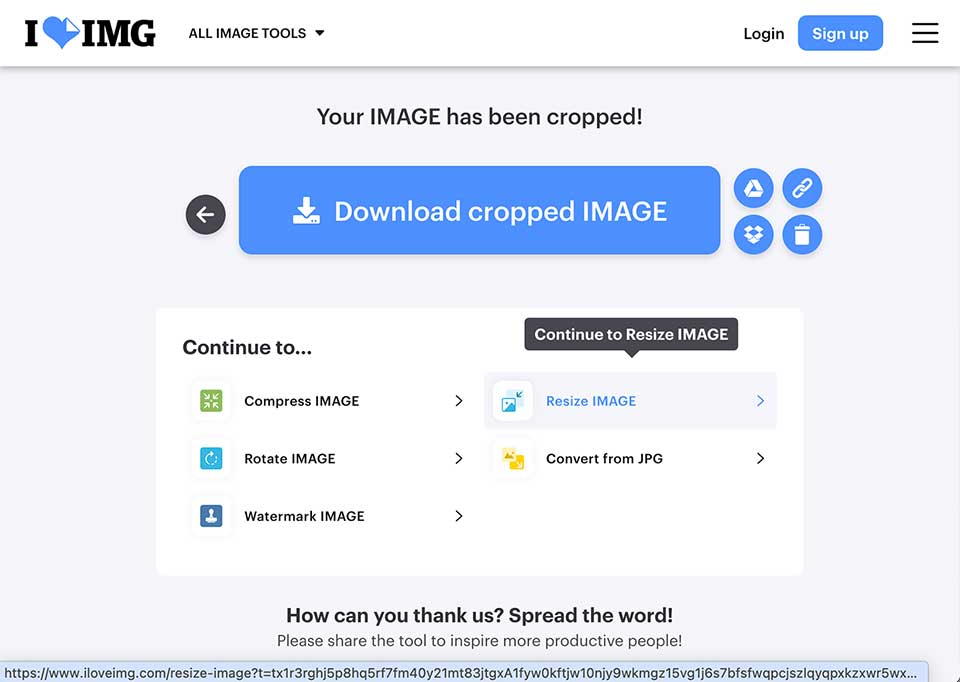
4. Click Resize IMAGE.
5. Re-input the dimensions you want the final image (1440 x 960) and click Resize IMAGE.
6. Click Compress IMAGE.
7. Click Compress IMAGE button.
8. Download the image.
Last step - give iLoveIMG some love by sharing the link to their awesome website or maybe even sign up.
Step 1

Step 2

Step 3

Step 4

Step 5

Step 6

Step 7

Step 8


